Painting

Residential Painting

Residential painting is a professional service that painters provide to homeowners. It includes interior and exterior painting for homes, apartments, condos, and other living spaces.

The type of paint used in a residential project varies depending on the space. For example, bedrooms are low-impact areas that can use any paint, including flat or matte latex. Click here to Learn More.

painting

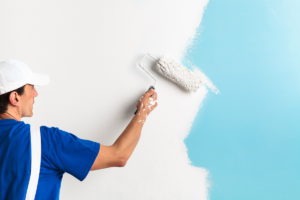
Residential painting is a service that involves the professional application of paint to enhance living spaces. It is a highly visual profession that requires a blend of skill, creativity, and design sensibility. Residential interior painters are responsible for transforming ordinary living environments into visually stunning spaces that reflect the homeowner’s tastes and lifestyle preferences. Choosing the right paints and maintaining good maintenance practices are critical for the success of residential painting projects.

The scope of a residential painting project depends on the type of house being painted. For example, a single-family home may be painted with oil-based or water-based paints while an apartment complex or condominium is typically coated with latex-based paints. It is also important to consider the size of the living space and whether it will be painted inside or outside.

A residential painting project can be complicated and require a great deal of preparation and attention to detail. It is crucial to hire a reliable painting contractor that has the experience and expertise to ensure that your project goes as planned. The contractor should provide a detailed quote that outlines the costs of materials, labor, and unforeseen expenses. This will help you budget for the project and avoid any surprises down the road.

Moreover, residential painting projects require a variety of tools that homeowners may not have access to. A professional painting company has a treasure trove of tools that will help them complete the job quickly and efficiently. These tools include high-quality brushes, rollers, spray guns, and trays for storing paint. These tools can make the difference between a professional-quality finish and an amateur one.

Additionally, a quality residential painting contractor will stay abreast of the latest trends in color and ideas. This will allow them to create a unique look that is both stylish and timeless. These trends can include everything from calming earth tones to bold jewel colors, and they can be used to elevate the aesthetics of any room in the home.

Residential painting contractors have experience communicating with homeowners and preventing damage to furnishings, floors, and other surfaces. They also understand the different materials and surfaces that need to be painted, such as wood, tile, vinyl, and drywall. In addition, they are familiar with the appropriate paints for each surface, how to properly prepare those surfaces, and the best techniques for applying the paint to achieve a beautiful, professional finish.

Safety is a major concern during any type of painting project. Paint fumes and flecks of paint can cause eye irritation, and it’s important to protect yourself and others with the proper safety gear. Wearing a face mask will help prevent breathing in these chemicals. It is also a good idea to wear goggles to prevent splashes in the eyes, and gloves and a coverall will protect your skin from any irritants. Finally, make sure that the area is well-ventilated so that harmful vapors do not build up. Fans, spray booths, open doors, and windows will circulate fresh air and dilute harmful vapors.

A residential painting project takes place in a homeowner’s home, so the working environment is much more controlled than on a commercial jobsite. In a commercial painting project, there may be a lot of foot traffic and business is likely to continue during the work, so the jobsite needs to be kept safe with barriers and signs to direct people away from the work areas.

In a residential painting project, the focus is on meeting the homeowner’s vision and the careful application of the paint to meet those goals. In commercial projects, a greater emphasis is placed on productivity and efficiency because delays can be costly for the business.

Both types of painting require a lot of supplies, but the quantity and types of supplies required differ. Generally, residential painting requires basic equipment that is similar to what any homeowner would purchase on their own, including things like drop-cloths, step ladders, rollers, paint trays, and paint brushes. In contrast, commercial projects often require more heavy-duty materials and equipment since the space is larger.

Residential painting focuses on enhancing the aesthetics of homes and meeting homeowner preferences. In contrast, commercial painting aims to create an inviting and brand-appropriate environment in non-residential properties such as offices, shops, restaurants, warehouses, etc. While both types of painting play a crucial role in enhancing the appearance and durability of properties, there are many different factors that make them distinct from each other.

For example, the size of the project is one of the biggest differences between commercial and residential painting. Commercial projects tend to be larger in scale and require a greater number of surfaces than residential painting projects do. As a result, commercial painting requires more advanced equipment and a higher level of expertise to ensure that the work is completed within the required timelines. Additionally, the use of industrial-strength paints with high sheen levels can add to the length of time the job takes to complete.

Another important difference between commercial and residential painting is the working environment. Commercial painting is typically conducted during business hours, so it is essential that the job be completed without disrupting the flow of business. This requires a great deal of planning and a focus on productivity to meet deadlines and avoid costly delays.

In addition, environmental regulations and protocols must be followed during the process. This includes proper storage and disposal of hazardous materials. Additionally, commercial painters are often required to wear additional protective gear to ensure their safety.

When it comes to working on the exterior or interior of a home, residential painters have a lot more experience than their commercial counterparts. They know how to prepare the property and apply the paint using a variety of techniques for long-lasting results. Additionally, they are able to provide valuable insights into how the work will impact the home’s overall look and feel.

Residential painters also have more experience communicating with homeowners and providing them with helpful tips on how to protect their belongings during the painting process. As a result, they can help the homeowner achieve the desired results with minimal disruption to daily life.

Residential painting is a service provided by professional painters who help homeowners achieve a new and updated look for their home. This type of painting involves surface preparation, such as filling cracks and sanding, along with the application of primer and paint to achieve an aesthetic and protective finish. The service is typically performed on a house’s interior or exterior walls, cabinets, and trim. Residential painting is a key part of homeowner maintenance and can improve the overall value of a property.

There are several factors that influence the time required to complete a residential painting project. These include the size of the house, the number of rooms to be painted, and the type of paint used. It is important to consider all these factors when planning a residential paint project. Having realistic expectations about the duration of the project can save both time and money. It is also helpful to plan for the inconvenience of having painters around, such as moving furniture or dealing with paint fumes.

Unlike commercial painting, which is typically done in large spaces with heavy equipment, residential painting is usually conducted in small to medium homes and apartments. This type of painting requires a different set of skills and specialized materials. Painters who specialize in residential painting usually use rollers, painting trays, step ladders, and cleaning materials that are similar to what is available at home improvement stores. In contrast, a commercial painter often uses pressure washers and specialized brushes that are designed for high-rise buildings.

Residential painters are responsible for meeting the vision of the homeowner, and they can do this by choosing colors, treating surfaces properly, and applying the paint in an efficient manner. It is also important for them to take into account the weather conditions when working on exterior painting. In addition, they need to be mindful of the homeowner’s schedule and the amount of time that will be needed to complete the project.

The length of time it takes to complete a painting project can be influenced by a variety of factors, including the size of the home, the type of paint used, and the amount of prep work that needs to be done before the actual painting begins. It is crucial to plan ahead and hire a professional team to ensure that the job is completed on time.

Uncategorized

Interior Residential Painting Techniques

Painters In Delaware your home interior is one of the most important home improvement projects you can do. It can dramatically increase the value of your home and make it look more beautiful.

Choosing the right paint is vital to ensure you get the best results. The type of paint you use will affect the color and finish and can also influence how long it takes to dry.

Texture painting is a popular interior residential technique that can create a unique look on your walls. The process involves using additives to the paint, which can give it a bumpy or gritty appearance. It is a great option for those who want to add some interest to their home without spending much money. However, it’s important to know what you’re getting into before you start this project. It’s also a good idea to do a test run before you apply it to your walls. The texture paint will most likely have instructions on the package regarding proportions and process, so be sure to read those carefully.

Some different types of textured paint are available on the market, and you can choose one that fits your style. For example, you can purchase a premixed textured paint that is ready for use and contains small, gravel-like particles. Another option is to buy paint and mix the texture ingredients, giving you more flexibility. There are also smooth textured paints that don’t contain any sand but are thicker and can give your walls the appearance of plaster or stucco.

When applying textured paint, being patient and working slowly is important. This is because the patterns can only be created while the paint is wet. Once it dries, the paint becomes much more difficult to manipulate. To make the most of your painting experience, working on a small area at a time is best.

Hiring a professional is a good idea if you’re new to painting. They’ll be able to help you find the right style for your home, and they’ll also be able to guide you through the process. In addition, a professional can make your walls look much better than you could do alone.

Before you begin, make sure the walls are clean and free of major blemishes. While textured paint can hide imperfections, it cannot disguise large holes or other damage.

Color blocking is a great way to bring energy into any space. In addition to brightening walls, it can highlight a room’s architectural features. The color-blocking technique can be used on walls, ceilings, cabinets, and fences! Using color blocking on these elements can give the room a dramatic look that will turn heads.

Colors that complement each other are best for color-blocking. It would be best to start by determining what colors are already present in your home and then select colors that work well with them. This will ensure that you create a harmonious design. It is also helpful to look at the color wheel to see what colors pair well. For example, blue and orange work well together. You can also use pastels with neons for a more unexpected look.

Another way to incorporate color-blocking into a space is by infusing it into a natural material. For example, you could paint an entire room boldly and then add wood accents to complement it. This will create a look that is both modern and rustic at the same time. This is a perfect solution for those who want to avoid a traditional look and still have a bold palette.

Often, you can find inspiration for color-blocking from contemporary art. It is believed that Piet Mondrian was the originator of this art movement, which he called Neo-Plasticism. His paintings featured simple squares and rectangles, influencing many other design styles. This trend has exploded into the fashion world and now appears on everything from t-shirts to furniture.

While most people think that only two colors are ideal for color-blocking, you can use as many. Some artists and color experts recommend using more than three colors to create an impactful look. This allows you to experiment with different hues and learn how they react under various light conditions.

One of the best things about this design technique is that it can be applied to any surface. For example, you can use it on a bedroom door, and no one will know it’s not the room’s original design. It’s a great way to define a reading nook in a playroom or to add contrast and definition to a dining area.

Painting a checkerboard pattern on your walls is an easy and stylish way to update your home. It’s also a great way to add a touch of nostalgia and personality to your living space. To get a perfect checkerboard design, it’s important to take your time and follow the proper steps. The first step is to prep the wall. Wash, patch, spackle, sand, and dry the surface before you start your project. You should also remove all outlet and light switch face plates and collect the screws in a zip-top bag for later.

Once you’ve prepped the wall, apply a base coat of the lighter color to the entire area. Then, use a pencil and a carpenter’s level to mark the squares you want to paint with the second color. Make sure the squares look equal and straight. You may need to do several rounds of measuring, marking, and taping to get them right.

Next, apply vertical strips of painter’s tape to the walls to create the block sections of your checkerboard pattern. Make sure the tape is positioned inside the squares you’ll be painting the second color so that only the edge of the box will be exposed to paint. If the squares aren’t even, you can measure and cut another strip of tape to create a new, evenly-sized square, then apply it to the wall.

Once the boxes are marked and taped, you can begin painting. Be careful not to go over the areas that will be the base color of your checkerboard, as this can cause the second color to bleed into the existing paint. When you finish painting, allow the paint to dry for at least 24 hours. After that, you can remove the tape and enjoy your finished checkerboard!

Letter stenciling is a fun way to add character and texture to your walls. It can be applied with a sponge or stenciling brush and used with any paint medium. Stencils are available in a wide range of sizes and fonts. You can also choose various colors, finishes, and textures to match your wall color or décor. If you’re new to stenciling, practicing first on cardboard or another surface is a good idea.

Whether you want to customize your home or want a unique accent wall, letter stenciling is an easy and affordable option. The key to success is choosing a simple design with straight lines and uncomplicated shapes. These designs are easier to cut out than curved edges and intricate details. You can draw the design by hand or use an image or photograph as a reference. Choose a high-resolution version to avoid distortion if you’re using a photograph.

To become a skilled artist, you can purchase pre-cut letter stencils for a quick and easy project. These stencils can be made from pliable, durable mylar or rigid, lightweight aluminum and can be custom-cut to any size and style. They can be used for one-time projects or produce many letters and designs simultaneously. Stencils can be purchased for a few dollars or less and are easy to clean.

These stencils can be used for various projects, including signs, graphic design, painting, and murals. They’re shatterproof and work with pencil, pen and ink, markers, and paint. They also come with spacers to help you keep the letters consistently spaced and aligned.

Whether you’re looking for an old-fashioned serif font or a flowing script, these letter stencils are ideal for any DIY project. They’re laser-cut for precision and are compatible with a wide variety of paints. They’re also reusable so that you can apply them again and again. They’re ideal for decorating your living room or bedroom and can even be used for labeling or up-cycling old furniture.

Painting

Preparing For Home Painting

Painting your home is a great way to refresh its appearance. It can also allow you to fix broken siding, replace window trim and doors, or add new crown molding.

Bunbury Painting Service can make the job easy for you, but playing a role is important, too. Taking steps like cleaning the walls, moving furniture to the center of the room, covering doorknobs, and removing outlet plates can save you money on labor costs.

painting service

A fresh coat of paint can make a dramatic difference to any home. However, selecting the right color can be challenging. The color selection process can also be time-consuming. Whether you are remodeling for an upcoming sale or maintenance purposes, take the time to consider your options before committing to a color. Choosing the right paint colors can impact the mood of a room as well as the appearance and value of the house.

A good place to begin your home painting color search is with items you plan to keep in the room, like furniture, rugs, and accessories. Then, look to your flooring and ceilings for guidance. This will ensure that your new paint will work with the colors in the rooms that will stay and will not clash with your new color scheme.

During your color search, avoid going overboard with bright or saturated hues. Consider using it on an accent wall if you love a bold orange or yellow. Then, neutrals will be used for the main walls and trim to balance the space. If you’re worried about commitment, start with a smaller room area, such as a powder room or small bedroom. This way, you’ll be able to experiment with the color without feeling too committed if it turns out to be a bad fit.

If you are drawn to a bright color, purchase a sample paint pot and test it in your room’s lighting. Always surround your samples with white paper to prevent existing paint color from skewing your perception of the hues. Also, remember to sample your colors against wood trim, carpet, and other permanent elements in the room.

One of the biggest mistakes homeowners make when choosing an interior paint color is not considering their home’s overall design. A warm beige may read as sad or depressing in a dark room but can look rich and luxurious in a sunny, open space.

To avoid a color disaster, choose a shade that can be used throughout the house for trim, doors, and windows. This will help create a seamless, cohesive look in the home and save money on future touch-ups.

Painting your home can be an easy, inexpensive way to boost curb appeal and resale value. Preparing yourself before hiring a professional painter or attempting the job is important. Thorough surface preparation will result in a long-lasting, beautiful paint job.

Preparing for interior house painting involves cleaning, patching, sanding, and priming walls before painting. It’s also important to mask off areas and things you don’t want to be painted. Wide strips of painter’s tape can cover light switches, electrical receptacles, ceiling fixtures, built-in bookshelves, and window trim. It’s a good idea to purchase a variety of painter’s tapes of various widths so you have the right size for each task.

Removing any wall decor, clocks, pictures, and other decorative fixtures is also a good idea. Taking down curtains and other window treatments before your painting project begins would be best. This will help your painting contractor work more easily and quickly and keep them from accidentally removing paint.

Move large furniture out of the way or to the center of the room. Covering any furniture you can’t move with plastic, canvas, or sheets is also a good idea. This will prevent them from getting dirty, wet, or dusty while you’re working on other parts of the room.

While you’re doing this, make sure to dust the surfaces and wipe away any cobwebs or dirt that may be hanging from the walls. You can use a brush, duster, or a cloth soaked in water with mild detergent to remove any lingering dust and grime.

A power wash is typically the best way to clean your exterior walls. This will help eliminate any mildew and mold that is present. If you don’t have a power washer, mix a quart of bleach and three quarts of water to clean the walls thoroughly.

Following the sun throughout the day when you’re prepping for outdoor house painting is a good idea. This will help you avoid direct sunlight, which can cause the paint to dry too fast and affect the outcome. It’s also important to let each coat of paint dry completely before applying the next.

Home painting is an inexpensive way to refresh your home’s exterior or interior. A few basic tools can make the process easier and ensure you have everything you need to complete the job. Ladders, coverings, painter’s tape, and canvas drop cloths are all essential painting equipment to help you avoid mistakes and deliver a quality customer experience.

Before your team begins painting, they should thoroughly walk around the space to understand what areas will need work. With a notebook in hand, take note of all walls and surfaces that need to be painted. If you’re painting the entire house, divide your total wall area into segments to help you determine how much paint to purchase. A good rule of thumb is to buy 10 percent more than you think you’ll need.

After a walk-around, your team should start by cleaning the walls. This will help the new coat of paint adhere correctly and look its best. You can use a wire brush or a paint scraper to remove loose paint from rough or uneven surfaces. You’ll also need to sand the walls to smooth them before applying a primer.

A large bucket can combine multiple cans of the same color to save time and money. Investing in high-quality paint is also a good idea, as it will be less likely to crack or chip and will last longer than a cheaper product.

A canvas drop cloth helps prevent floors from getting paint stains and makes cleaning much faster and easier. A screwdriver is a handy tool to have on hand for removing things like light switch plates and outlet covers. You’ll also want a sponge for applying wall cleaner and a sander for smoothing rough or uneven surfaces.

When looking for a home painting contractor, search online, ask friends and family, or consult a service like Angie’s List or Yelp. But it would be best to remember that a painting company with the lowest price isn’t always the best option. A quality job takes time and preparation, so it is worth paying a bit more for a professional who will complete the job quickly and to your satisfaction.

Before choosing a painter, ask them for detailed bids that include the time to finish the job and any special services you want. It’s also important to determine if they use their employees or subcontractors. It is best to choose a company that uses its employees because they are people the owner knows well and trusts. They will work in line with the company’s values and principles.

After narrowing down the list of painting contractors:

  1. Ask each for references.
  2. Contact those customers and visit their homes to see their work.
  3. Ask them about the quality of the paint and artistry and how satisfied they were with the overall experience.

Another important question is whether a painting company provides liability and workers’ compensation insurance for their employees. If you have a worker fall off of a ladder or get injured while working on your home, this insurance will protect you. You can also check a contractor’s credentials by asking them for copies of their insurance certificates.

Once you have interviewed several painters, you should decide which one will do the best job for the best price. Beware of a contractor who promises the lowest price because this typically indicates that they don’t have the proper equipment or training to do the job correctly.

A good painting contractor will be professional and courteous and treat your home respectfully. They should keep the area clean as they work and, if you’re home during the painting process, do everything they can to minimize disruptions.